v14.0ATX 2014
Creating a New Security Group
If the default security groups do not meet the needs of your business, you can create your own custom group.
Only the Admin user or users with Security Manager rights may access Security Manager.
To create a new security group:
- Click the Tools menu; then, select Security Manager.
- Click the Groups tab.
- Click New.

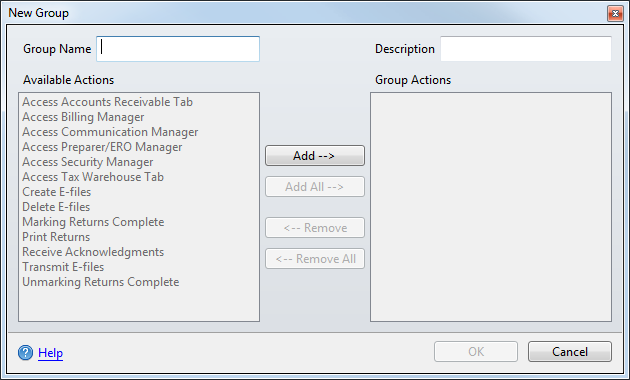
New Group dialog box
- In the Group Name field, enter the name of the new group.
- In the Description field, enter a description for the new group.
- To associate a set of actions with the group, do one of the following:
- Select the desired action(s) in the Available Actions pane; then, click Add --> to move the selected action(s) to the Group Actions pane.
- Click Add All --> to move all Available Actions to the Group Actions pane.
- Double-click desired actions in the Available Actions pane (one at a time) to move them to the Group Actions pane.
- Click OK when all desired actions for the new group appear in the Group Actions pane.
To remove an action from a Group:
- Do one of the following:
- Select the desired action(s) in the Group Actions pane; then, click <-- Remove to move the selected action(s) to the Available Actions pane.
- Click <-- Remove All to move all Group Actions to the Available Actions pane.
- Double-click the desired action(s) in the Group Actions pane (one at a time) to move them to the Available Actions pane.
- Click OK when all actions to be removed from the group appear in the Available Actions pane.
See Also: